
In a few weeks, me and a friend are heading up to Oxford for a few nights to visit a friends who are studying there. Whilst we are there we're going to be attending two formal dinners, which means pretty dresses and fancy food all round! I have been put in charge of styling everyone's hair for the dinners, so I decided it was time to start practising my up-do's.
I've always lusted after the likes of Hilary Duff and Blake Lively's messy red carpet up-do's, and decided to play around until I managed to create something similar. I finally came up with a style I liked, and wanted to share it on here seeing as it's prom season and some of you might need a little inspiration! My favourite thing about this style is you barely need to use bobby pins (they are the bane of my life, but you only need three or four to hold this style in place!) I hope you like this style as much as I do, read on to find out how I created it!

Your hair needs to have some texture to it in order for this style to hold nicely. I sprayed in some L'oreal Matt & Messy Salt Spray as my hair was freshly washed, but if you have day-old curls or slightly dirty hair then you may not need any product.

Begin by parting your hair wherever feels natural, and taking a section of hair from the front of your head and splitting it in two.

Cross the front piece over the back piece, to create the first stitch of your twist.

As if you are doing a French braid, grab another section of hair from the top of your head...

... and add it to the piece that you just crossed over the top.

Grab another piece of hair from the front of your head and add it to the bottom strand of the twist. Now that both of the strands in the twist are slightly thicker, twist them together again before adding more hair to each section.

Continue twisting until you reach the back of your head, it should look something like this.

You can then tie it off with an elastic, and repeat the whole process on the other side of your head, so you have one twist on either side. Next, gather all your hair together and split it in half, bringing each section over one of your shoulders.

Now you are going to braid each side in to a fishtail braid. If you don't know how to do a fishtail braid, I'm sure there are many tutorials you can watch on YouTube; however I will have a bash at explaining it here! Start by splitting the hair in to two sections.

Grab a piece of hair from the back of the back section...

... and bring it over the top and join it to the front section.

Then take a piece of hair from the front of the front section, and bring it over the top to join in to the back section.
Take hair from the back of the back section to the front section, take hair from the front of the front section to the back section; it's simple really!

Continue braiding all the way down, and repeat on the other side of your head. The braids don't have to be perfect; in fact I think they look a little better when they're messy!

This is actually quite a cute style in itself, so you could definitely leave it like this for a more casual look.

To turn it in to an up-do, all you need to do is tie the two braids together. Simply pull the two braids upwards, and cross them over at the back of your head.

Then loop one around the other and pull tight, just as if you were tying a knot.

The length of your hair determines how many times you will be able to knot the braids together, I tied mine three times before securing the ends with bobby pins...

... and spritzing the style with hairspray!

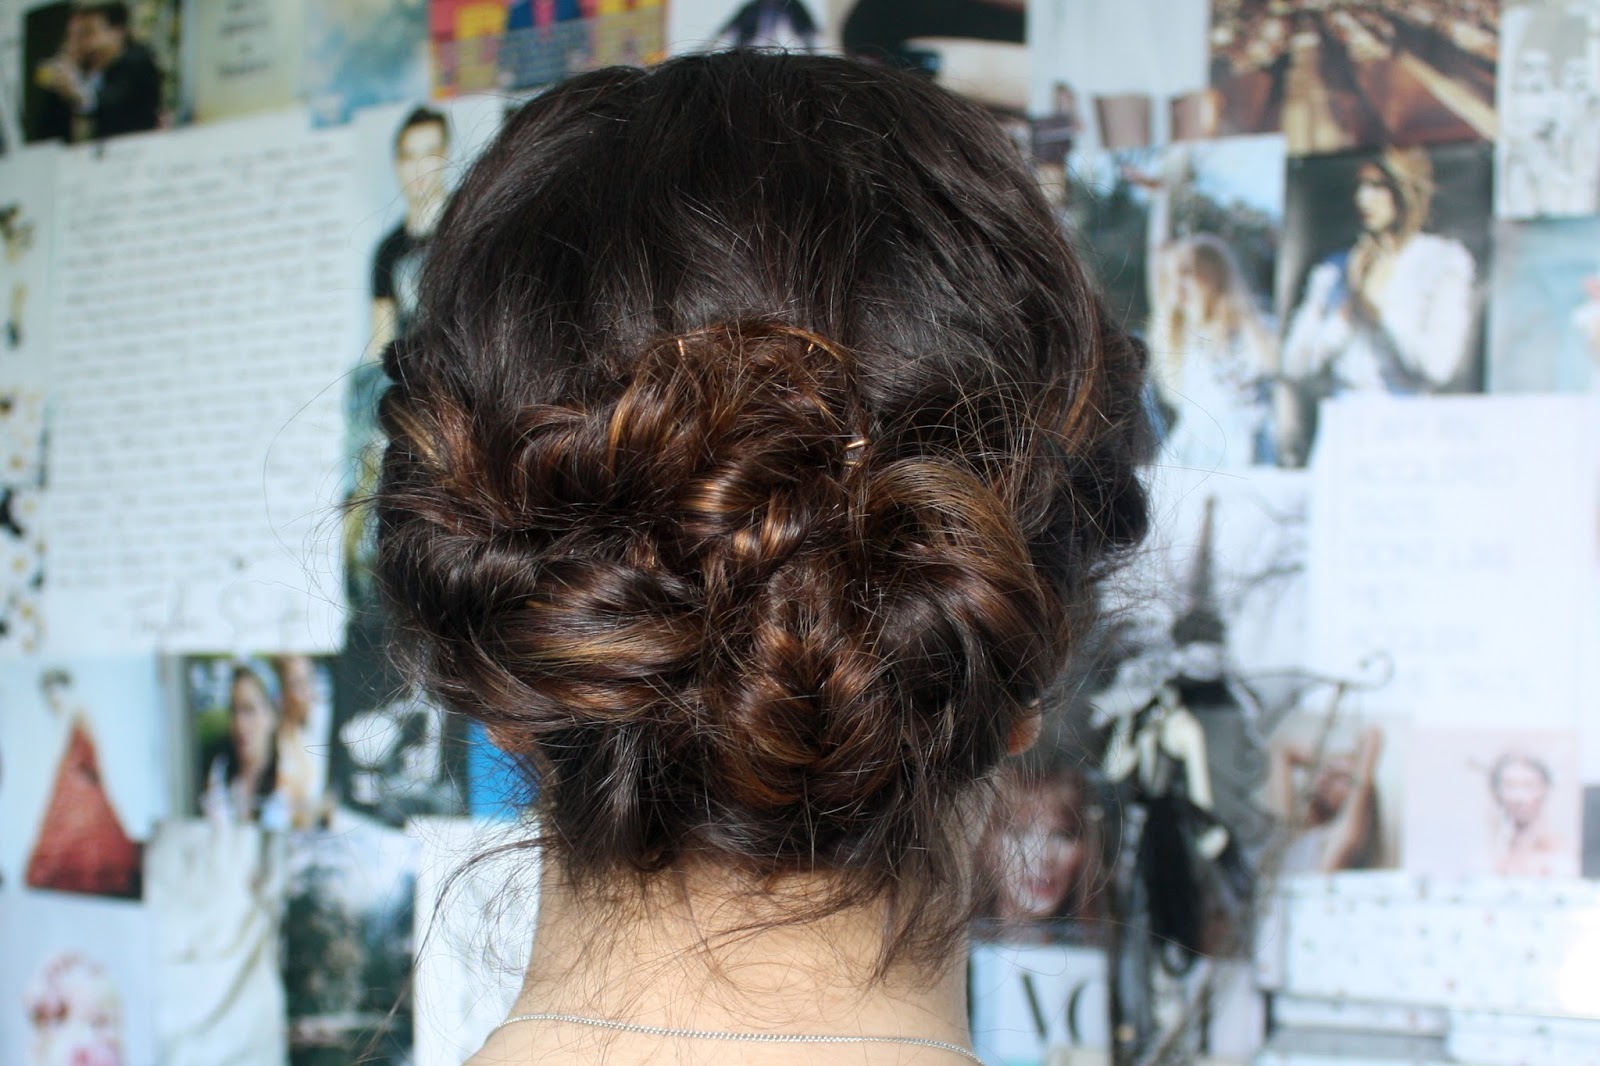
When completed, you're left with an intricate looking up-do, reminiscent of Mary-Kate and Ashley Olsen's infamous bohemian hairstyles. People will think you spent hours creating the perfect messy look, when in reality it only took twenty minutes!


You could also loosen up the twists slightly, and pull some sections out at the front to create an even softer look.
Let me know if you give this hairstyle a try, I'm certainly going to be wearing many variations of it over the next few weeks!
Don't forget that my giveaway ends on Friday!
KJ xo
If only I could be patient with my hair like that so I could achieve this look!
ReplyDeleteI love it. :)
Naturally Jes
This looks so cute! I just shared a hair tutorial similar to this on my blog, but I really like your method of knotting the braids at the end! :)
ReplyDeleteacoupleofbrownfinches.blogspot.com
Hey,
ReplyDeleteI have nominated you for The Versatile Award and The Very Inspiring Award..
go to my blog to check it out jenniferjayne.blogspot.co.uk
xx